


1️⃣ Cream the Butter & Sugars (5 minutes)

Start by beating together 1 cup softened unsalted butter, 1 cup packed brown sugar, and ½ cup granulated sugar. Use a hand or stand mixer on medium speed for about 5 minutes until the mixture is light and fluffy.
This step is crucial. Creaming incorporates air, which helps the cookies rise and gives them a soft, tender crumb. Don’t rush it — the mixture should look pale and creamy before moving on.
Pro Tip: If your butter is too cold, cut it into cubes and let it sit out for 15–20 minutes before mixing. Too warm, and your cookies may spread too much during baking.
2️⃣ Add Eggs & Vanilla (3 minutes)
Beat in two large eggs, one at a time, mixing well after each addition. Then add 2 teaspoons vanilla extract and blend until smooth.
The eggs help bind the dough, while vanilla deepens the caramel aroma. At this point, the mixture should be silky and glossy.
Pro Tip: For an extra flavor boost, add ½ teaspoon almond extract or a pinch of instant espresso powder — they subtly intensify the caramel and toffee notes.
3️⃣ Combine Dry Ingredients (5 minutes)
In a separate bowl, whisk together 2½ cups all-purpose flour, 1 teaspoon baking soda, and ½ teaspoon salt. Gradually add this dry mixture to your wet ingredients, mixing on low speed just until combined.
Avoid overmixing here. Overworking the dough develops gluten, which can make cookies tough instead of tender. Stop as soon as the flour disappears.
4️⃣ Fold in the Goodies (3 minutes)
Now for the fun part! Gently fold in 1 cup caramel bits, ¾ cup toffee bits, and ½ cup crushed cornflakes or crispy rice cereal (optional).
Use a spatula, not your mixer — you don’t want to crush the caramel or cereal. Mix just enough to evenly distribute everything.
At this stage, your dough will be thick, buttery, and absolutely irresistible. (Go ahead — we all sneak a taste.)
5️⃣ Chill the Dough (30 minutes)
Transfer the dough to the fridge and chill for at least 30 minutes. This step helps the butter solidify, preventing excessive spread during baking and allowing the flavors to meld beautifully.
Pro Tip: For even better results, chill overnight! Slow chilling enhances the caramel notes and gives your cookies that perfect chewy interior.
6️⃣ Bake the Cookies (10–12 minutes)
Preheat your oven to 350°F (175°C). Line baking sheets with parchment paper. Scoop tablespoon-sized portions of dough, spacing them about 2 inches apart.
Bake for 10–12 minutes, or until edges are golden and centers look just set. Don’t worry if they seem a bit underbaked — they’ll continue to firm up as they cool.
Pro Tip: For that bakery look, press a few extra caramel and toffee pieces onto the tops of each cookie right before baking.
7️⃣ Cool & Enjoy (10 minutes)
Let cookies cool on the pan for 5 minutes, then transfer to a wire rack. Enjoy warm for soft, gooey centers or cooled for a crispier bite.
When you take that first bite — caramel melting, toffee crunching — you’ll understand why these cookies have become a social media favorite.
Baking Science: Why Chilling the Dough Matters
If you’ve ever wondered why professional bakers always chill their cookie dough, here’s the truth: it’s not just for convenience — it’s baking science at its best. This one simple step turns good cookies into bakery-quality masterpieces.
When you refrigerate your dough, several magical things happen behind the scenes:
1. Flavor Development
During chilling, the dry ingredients (especially the flour) have time to absorb moisture from the butter and eggs. This resting period deepens the dough’s flavor — the brown sugar caramelizes more richly when baked, the vanilla intensifies, and every ingredient harmonizes like a slow-simmered sauce.
Think of it like marinating a steak — the longer the flavors mingle, the more complex and irresistible the final result.
2. Better Texture & Shape
Chilling solidifies the butter, which means the cookies won’t spread as much in the oven. Instead of thin, flat discs, you’ll get thick, chewy centers with perfectly crisp edges. That’s the secret to achieving that “bake shop” look.
If you skip chilling, your cookies can spread too quickly before they set, leading to a greasy or overly flat texture. Thirty minutes is good, but overnight chilling takes it from great to phenomenal.
3. Controlled Caramelization
When butter and sugar melt slowly during baking, they create those golden, caramelized edges that make cookies so addictive. A chilled dough ensures this process happens evenly — not too fast, not too slow.
4. Easier to Handle
Cold dough is firmer and less sticky, making it easier to scoop, roll, and shape. You’ll also find that chilled dough bakes more uniformly.
Pro Tip:
If you’re short on time, scoop the dough into balls before chilling. That way, you can pop them straight from the fridge to the baking sheet without waiting for the entire batch to firm up.
So, remember — patience pays off. Chilling your dough is like letting your cookies take a nap before the big show, and when they wake up in that hot oven, they’re ready to impress.
Serving Suggestions: Pair It Like a Pro
Sure, you can devour these cookies straight off the rack (and honestly, who wouldn’t?). But if you want to elevate the experience, here are some delicious serving ideas to turn your caramel crunch cookies into a next-level dessert moment.
1. Classic Comfort: Cookies & Milk
The timeless combo never fails. A glass of cold milk balances the rich sweetness of caramel and toffee, making every bite feel nostalgic and comforting.
For a fun twist, try dunking them in salted caramel milk or cold brew coffee milk — both take the flavor pairing to a whole new level.
2. Coffee Lovers’ Dream
These cookies and coffee are soulmates. The nutty bitterness of coffee pairs perfectly with caramel’s buttery sweetness. Try pairing them with:
- A latte or cappuccino for creamy harmony.
- A dark roast or espresso for contrast.
- Or even iced coffee with caramel syrup for a refreshing afternoon treat.
If you really want to go pro, crumble one cookie into your coffee and stir — instant caramel cookie latte magic.
3. Ice Cream Sandwich Heaven
Take two cookies, sandwich a scoop of vanilla or butter pecan ice cream between them, and freeze for 30 minutes. The result? A gourmet caramel ice cream sandwich that’s both chewy and creamy. Drizzle with warm caramel sauce and sprinkle with sea salt flakes to impress any guest.
4. Dessert Charcuterie Board
Yep, dessert boards are trending — and these cookies are the star ingredient. Pair them with chocolate-dipped strawberries, mini brownies, pretzels, and caramel popcorn. The combination of textures and flavors makes for a stunning presentation at parties or holiday gatherings.
5. Crumble It!
Crumble leftover cookies over ice cream, pudding, or even yogurt for a quick, crunchy topping. The toffee and caramel bits add a decadent crunch that tastes like a gourmet sundae topping.
These cookies aren’t just a dessert; they’re a canvas for creativity. Whether you keep it simple with milk or go all-out with an ice cream sandwich, one thing’s certain — every bite will be worth the bake.
How to Store & Keep Them Fresh
One of the best things about Caramel Crunch Cookies is how well they keep — if they last long enough, that is! To preserve that perfect balance of chewy and crisp, storage matters.
Room Temperature Storage
Once completely cooled, store the cookies in an airtight container at room temperature. Add a slice of white bread or a small piece of apple inside the container — it keeps the cookies soft by maintaining humidity balance.
They’ll stay fresh and chewy for up to 5 days this way (though, let’s be real, they’ll be gone by day two).
Freezing Baked Cookies
These cookies freeze beautifully. Arrange cooled cookies in a single layer on a baking sheet, freeze until solid, then transfer to a freezer bag. They’ll keep for up to 3 months.
When you’re ready to enjoy, thaw them at room temperature or warm in the oven at 300°F (150°C) for 5 minutes to bring back that just-baked texture.
Freezing Cookie Dough
Want freshly baked cookies on demand? Scoop chilled dough into balls and freeze them on a baking sheet. Once frozen, transfer to an airtight bag.
When ready to bake, no need to thaw — just add an extra 1–2 minutes to the baking time.
Pro Tip: Label your bag with the date and baking instructions. You’ll thank yourself later!
Proper storage keeps your cookies tasting bakery-fresh and gives you that “made-it-today” vibe even days (or weeks) later.
How to Freeze Dough or Baked Cookies
One of the best baking hacks for busy cookie lovers is learning to freeze dough or baked cookies the right way. It saves time, reduces waste, and means you can have warm, freshly baked cookies anytime a craving hits (which, let’s be honest, could be any time of day).
Here’s how to do it like a pro:
Freezing the Dough
- Scoop First: After mixing your dough and folding in the caramel and toffee bits, scoop tablespoon-sized portions onto a baking sheet lined with parchment paper.
- Pre-Freeze: Pop the entire tray into the freezer for 1–2 hours, or until the dough balls are solid.
- Bag It Up: Transfer the frozen dough balls to a resealable freezer-safe bag. Squeeze out as much air as possible to prevent freezer burn. Label with the date and “Bake at 350°F for 12–14 minutes.”
You can store the dough for up to 3 months. When you’re ready to bake, no need to thaw — just bake straight from the freezer, adding a couple of extra minutes to your baking time.
Pro Tip: If you love portion control (or just fresh cookies every night), freeze individual dough balls in small containers so you can bake exactly as many as you want at a time.
Freezing Baked Cookies
If you’ve already baked a big batch and want to save some for later, freezing is still your friend.
- Cool Completely: Let the cookies cool to room temperature — any residual warmth can create moisture and lead to sogginess when frozen.
- Layer Properly: Stack cookies with parchment paper between each layer to prevent sticking.
- Seal Tight: Place them in a freezer bag or airtight container.
- Reheat Gently: When ready to enjoy, pop one or two cookies into a preheated oven at 300°F (150°C) for 5–6 minutes or microwave for 10–15 seconds for that “just-baked” taste.
Freezing keeps your Caramel Crunch Cookies tasting freshly baked, chewy, and crisp-edged — even weeks later. It’s like having a little bit of happiness waiting in your freezer.
Caramel Drizzle & Garnish Ideas (Optional but Divine!)
If you’re the type who believes there’s no such thing as “too much caramel” (we see you 👀), then this section is for you. A drizzle of caramel or a sprinkle of extra toppings can turn your cookies into a show-stopping dessert worthy of a bakery display window.
1. Caramel Drizzle
Warm about ¼ cup of caramel sauce (store-bought or homemade) until smooth and pourable. Drizzle it over cooled cookies using a spoon or piping bag for a glossy finish.
- For thicker drizzles, let the caramel cool slightly before applying.
- For a pro touch, sprinkle sea salt flakes over the caramel before it sets — the sweet-salty contrast is irresistible.
2. Melted Chocolate Drizzle
Combine caramel and chocolate for a flavor match made in heaven. Melt ¼ cup milk or dark chocolate chips and drizzle lightly over your cookies in a zigzag pattern. The chocolate adds a beautiful contrast to the golden caramel tones.
3. Crunchy Garnishes
- Crushed Toffee or Candy Bars: Sprinkle extra toffee or chopped candy bars (like Heath or Skor) on top of freshly drizzled caramel.
- Toasted Nuts: Chopped toasted pecans, almonds, or hazelnuts add a gourmet flair.
- Gold Sugar Crystals: If you’re baking for a party or special event, a dusting of gold sugar or edible glitter adds a festive sparkle.
4. Ice Cream Companion
Turn your cookie into a dessert plate masterpiece — place one warm cookie on a small plate, top it with a scoop of vanilla ice cream, and drizzle caramel sauce over everything. The hot-and-cold combination is pure indulgence.
With these garnishing ideas, your cookies won’t just taste amazing — they’ll look like they came straight out of a professional bakery display.
Troubleshooting: Common Mistakes & Fixes
Even the best bakers have a cookie fail now and then — but don’t worry! Most cookie problems are easy to fix once you know what’s going on behind the scenes. Here’s your cookie crisis guide to ensure your next batch is flawless:
Problem 1: Cookies Spread Too Much
Possible Causes:
- Butter was too warm or melted.
- Dough wasn’t chilled long enough.
- Too little flour or too much sugar.
Fix:
Chill the dough for at least 30 minutes (or overnight for best results). Make sure your butter is softened, not melted, and double-check your flour measurement using the spoon-and-level method.
Problem 2: Cookies Too Hard or Crunchy
Possible Causes:
- Overbaked or oven too hot.
- Too little moisture (over-measuring flour).
Fix:
Bake until the edges are golden but centers still look soft. They’ll firm up as they cool. If they’re already baked, place a slice of bread in the storage container — it’ll soften them overnight.
Problem 3: Cookies Too Flat
Possible Causes:
- Butter melted too quickly.
- Dough was too warm.
- Missing or expired baking soda.
Fix:
Always chill your dough, and make sure your baking soda is fresh. If your kitchen is warm, refrigerate your dough balls again for 10 minutes before baking.
Problem 4: Caramel Bits Burning or Sticking
Possible Causes:
- Caramel pieces too close to cookie edges.
Fix:
Fold caramel bits more toward the center of the dough before baking. If a little caramel oozes out, don’t worry — it’ll harden into delicious, crispy candy edges!
Problem 5: Cookies Taste Bland
Possible Causes:
- Not enough salt or vanilla.
Fix:
Never skip salt in a sweet recipe — it enhances every flavor. And use real vanilla extract, not imitation. Trust us, your taste buds will thank you.
By understanding these little details, you’ll quickly move from “oops” baker to cookie master. Every batch teaches you something new — and hey, even the imperfect ones taste amazing with a cup of coffee. ☕


Caramel Crunch Cookies
Equipment
- Mixing Bowls
- Hand Mixer or Stand Mixer
- Baking Sheet
- Parchment Paper
- Wire Rack
Ingredients
Cookie Dough
- 1 cup unsalted butter softened
- 1 cup brown sugar packed
- 1/2 cup granulated sugar
- 2 large eggs
- 2 tsp vanilla extract
- 2 1/2 cups all-purpose flour
- 1 tsp baking soda
- 1/2 tsp salt
Mix-ins
- 1 cup caramel bits or chopped soft caramels
- 3/4 cup toffee bits
- 1/2 cup crushed cornflakes or crispy rice cereal optional, for extra crunch
Instructions
- In a large mixing bowl, beat together softened butter, brown sugar, and granulated sugar until light and fluffy (about 5 minutes).
- Mix in the eggs one at a time, followed by the vanilla extract. Beat until smooth and creamy (about 3 minutes).
- In a separate bowl, whisk together flour, baking soda, and salt. Gradually add this to the wet mixture, stirring until a soft dough forms (about 5 minutes).
- Gently fold in caramel bits, toffee pieces, and crushed cornflakes (if using) until evenly distributed.
- Refrigerate the dough for 30 minutes to firm up and improve texture.
- Preheat oven to 350°F (175°C). Line baking sheets with parchment paper. Scoop tablespoon-sized portions of dough onto the sheets, spacing them about 2 inches apart.
- Bake for 10–12 minutes, or until golden brown around the edges.
- Allow cookies to cool on the pan for 5 minutes before transferring to a wire rack. Enjoy warm for a soft, gooey center or cooled for a crispier bite!
Notes
Nutrition Breakdown (Per Serving)
Baking may be about comfort and joy, but it’s always nice to know what’s going into each irresistible bite. Here’s the approximate nutrition information for one Caramel Crunch Cookie (based on 24 cookies per batch):
| Nutrient | Per Cookie (Approx.) |
|---|---|
| Calories | 210 kcal |
| Total Fat | 10 g |
| Saturated Fat | 6 g |
| Cholesterol | 35 mg |
| Sodium | 110 mg |
| Total Carbohydrates | 28 g |
| Sugars | 17 g |
| Protein | 2 g |
| Fiber | 0.5 g |
Keep in mind — these are indulgent dessert cookies, not diet snacks, and that’s exactly why they’re perfect for special moments. The butter provides richness, while the caramel and toffee deliver sweetness in every bite.
If you’d like to make them slightly lighter, here are a few easy tweaks:
- Replace half the butter with unsweetened applesauce (texture changes slightly but still soft and chewy).
- Use dark chocolate toffee bits instead of milk for a lower sugar count.
- Swap part of the flour for oat flour for extra fiber and a rustic flavor.
That said, sometimes it’s best to enjoy a cookie for what it is — a delicious, comforting treat that brightens your day. ✨
You may read also :
Butterfinger Caramel Crunch Mini Pies – Bite-Sized Bliss in Every Bite
Butterfinger Caramel Crunch Pie: A No-Bake Dream Dessert
Frequently Asked Questions (FAQs)
1. Can I make the dough ahead of time?
Absolutely! This dough actually benefits from resting. You can refrigerate it for up to 3 days before baking, or freeze it for up to 3 months. Just let it soften slightly before scooping if chilled too long.
2. What if I can’t find caramel bits?
No problem! Simply chop up soft caramel candies into small pieces. You can even use caramel-filled chocolate bars for a decadent twist — the melted chocolate-caramel combo is divine.
3. My cookies came out too puffy — what happened?
If your cookies didn’t spread enough, your butter may have been too cold, or there was slightly too much flour. Try letting the dough sit at room temperature for 10 minutes before baking next time.
4. Can I use salted butter instead of unsalted?
Yes, you can! Just reduce the added salt in the recipe to ¼ teaspoon. Using salted butter gives a subtle flavor boost that actually enhances caramel’s richness.
5. How do I get perfectly round bakery-style cookies?
Right after baking, while the cookies are still soft, take a round cookie cutter (slightly larger than your cookie) and gently swirl it around each cookie. It’ll reshape them into perfectly round, professional-looking treats.
Final Thoughts – A Bite of Caramel Heaven
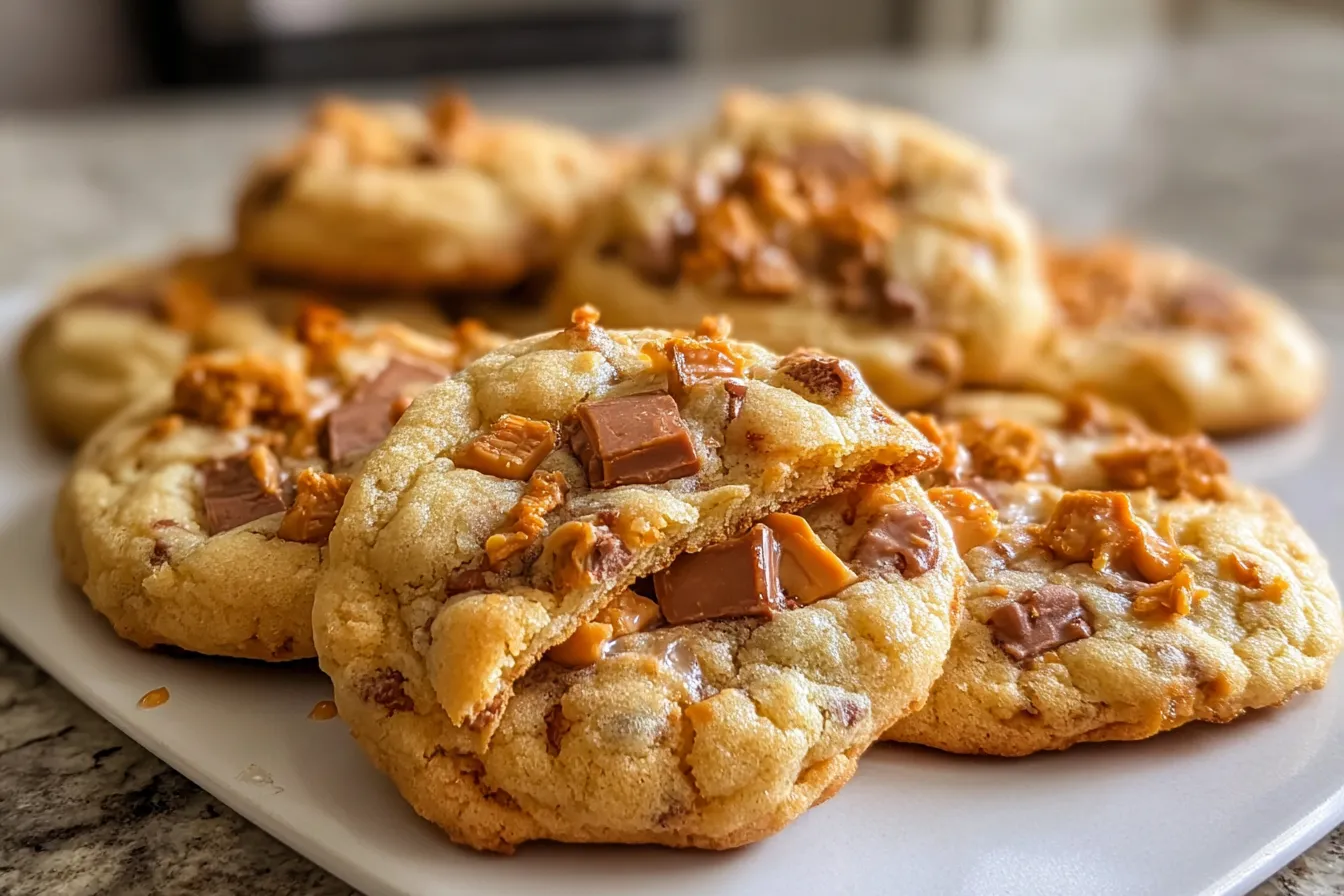
There’s something almost magical about pulling a tray of freshly baked Caramel Crunch Cookies from the oven. The golden-brown edges, the soft centers glistening with melted caramel, the buttery aroma filling your kitchen — it’s the kind of moment that feels both nostalgic and new every single time.
These cookies aren’t just about sugar and flour. They’re about creating little pieces of happiness — for your family, your friends, or just yourself after a long day. They remind you that joy can be as simple as a warm cookie and a glass of milk.
Every bite offers a story: the crisp crunch of toffee, the soft chew of caramel, and the comforting richness of butter that ties it all together. And if you close your eyes for a second, you might even feel like you’re standing in a cozy bakery surrounded by trays of golden, sweet perfection.
So whether you bake them as a weekend project, a holiday treat, or a pick-me-up for someone you love, these Caramel Crunch Cookies will always deliver — warm, gooey, and unforgettable.
If you make them, share them, and love them (and trust me, you will), remember to pass on the recipe — because good cookies, like good memories, are meant to be shared. 🍪💛
Similar recipes :
No Bake Caramel Crunch Butterfinger Truffles – The Ultimate Indulgent Dessert Bite
Butterfinger Caramel Crunch Bars – Layers of Crunch, Caramel, and Chocolate Bliss