
Step 1 – Preheat and Prepare
Before you even think about mixing the batter, let’s get the groundwork done right.
Preheat your oven to 325°F (165°C)—that’s the perfect temperature to cook the cake slowly, allowing the butter and sugar to caramelize beautifully without drying out the crumb.
Next, grab your bundt pan (this shape gives the cake that signature ring with deep ridges to catch the glaze). Grease it thoroughly with softened butter or non-stick spray, then dust with flour. Make sure you reach every nook and cranny—there’s nothing worse than a gorgeous cake that won’t come out of the pan!
Here’s a tip: use a pastry brush to spread the butter evenly and tap out any excess flour. If you want an extra insurance policy, you can line the bottom with a very light coating of sugar—this creates a slightly crisp, golden crust that contrasts beautifully with the soft interior.
Your kitchen should already start feeling cozy by now, and you’re officially ready to mix.
Step 2 – Mix the Dry Ingredients
In a large mixing bowl, combine:
- 3 cups all-purpose flour
- 2 cups granulated sugar
- 1 teaspoon salt
- 1 teaspoon baking powder
- ½ teaspoon baking soda
Whisk everything together thoroughly. You want to ensure that the baking powder and soda are evenly distributed throughout the flour—this is what gives the cake that perfect, even rise.
A little pro tip: Sift the flour mixture if you want a lighter, airier texture. This small step can make a big difference, especially if your flour has been sitting in the pantry for a while.
Now, set the dry mix aside. You’ll come back to it soon when it’s time to blend with the wet ingredients.
Step 3 – Cream the Butter and Add Wet Ingredients
This is the step that gives the cake its signature buttery soul.
In a large bowl (or a stand mixer if you have one), beat 1 cup unsalted butter until it becomes pale and fluffy—about 2–3 minutes.
Gradually add the sugar mixture, one cup at a time, and continue beating. You’ll see the texture turn creamy, light, and slightly glossy. That’s air being incorporated—essential for that delicate, melt-in-your-mouth crumb.
Next, add your 4 large eggs, one at a time. Make sure each one is fully incorporated before adding the next. Scrape down the sides of the bowl occasionally to ensure everything mixes evenly.
Now comes the vanilla—2 teaspoons of pure vanilla extract. This isn’t just for aroma; it deepens the buttery flavor and adds a cozy, warm sweetness that ties everything together.
Then, alternate adding your dry mixture with 1 cup of buttermilk, starting and ending with the dry ingredients. That means:
- Dry → Buttermilk → Dry → Buttermilk → Dry.
Mix slowly, just until combined. Overmixing at this stage can make your cake tough. You want the batter smooth, thick, and glossy—like rich golden silk.
Pour it gently into your prepared bundt pan, smoothing the top with a spatula. Take a moment to admire that creamy batter—it’s about to become something glorious.
Step 4 – Bake the Cake
Slide the pan into your preheated oven and bake for 60 to 65 minutes. Don’t be tempted to open the oven door too soon; it needs consistent heat to rise evenly.
Around the 55-minute mark, check for doneness by inserting a toothpick into the center. If it comes out clean (a few moist crumbs are fine), it’s ready.
The kitchen will smell heavenly at this point—warm butter, sugar, and vanilla wafting through the air like a sweet Southern breeze. The cake should have a deep golden color with a slightly crisp edge.
Once baked, remove it from the oven and place it on a cooling rack, but don’t remove it from the pan yet. This next step is where the real magic happens.
Step 5 – Make the Salted Caramel Glaze
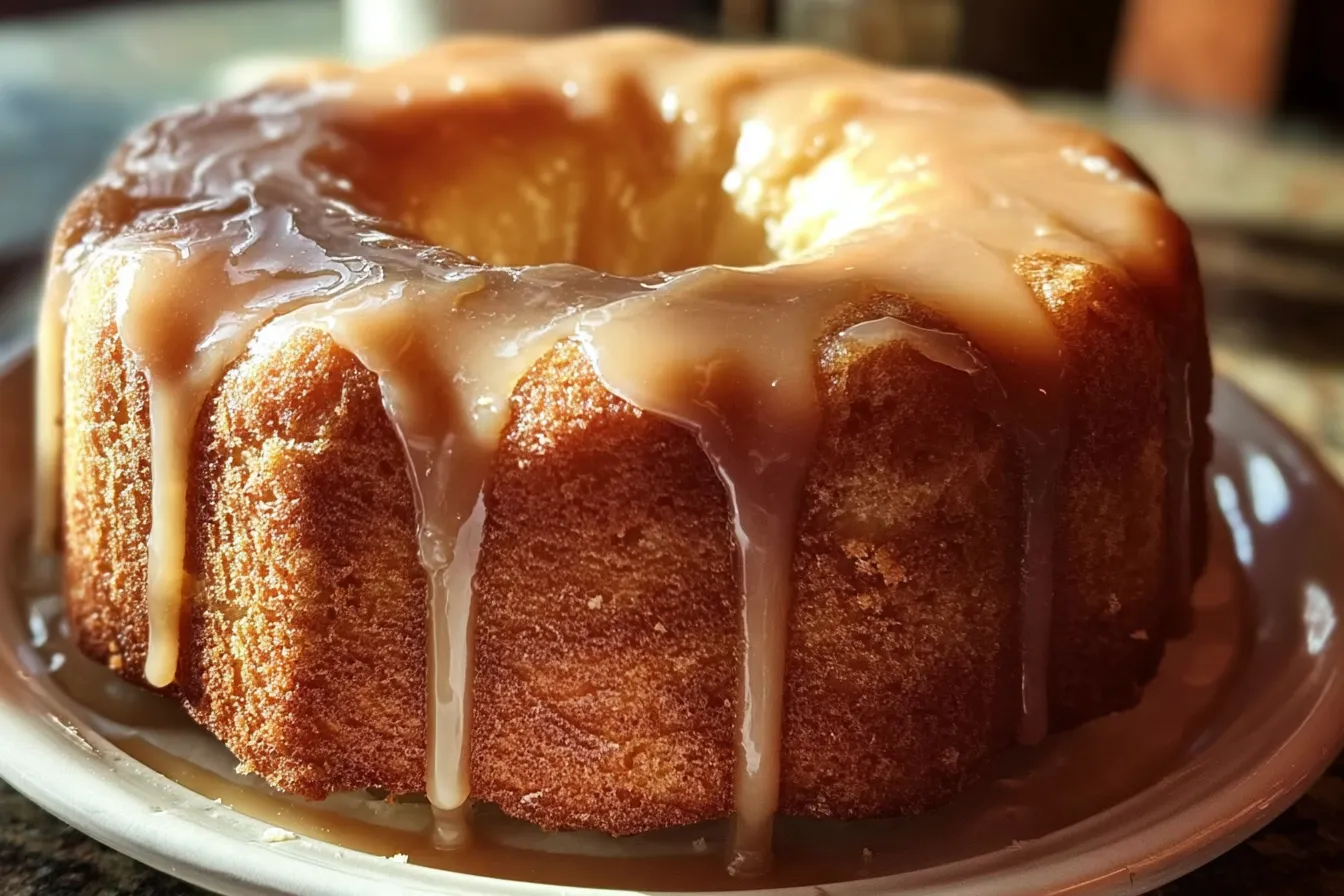
Now for the part that transforms a simple butter cake into the indulgent beauty you see in the photo.
In a small saucepan, combine:
- ¾ cup sugar
- ⅓ cup butter
- 3 tablespoons water
Set over medium heat and stir gently until the butter melts and the sugar dissolves completely—about 2 minutes. Avoid boiling too aggressively; gentle heat is key.
Once smooth and slightly golden, remove from heat and stir in:
- 2 teaspoons vanilla extract
- ½ teaspoon sea salt
You’ll notice the aroma instantly deepen—rich, buttery, and warmly sweet. The consistency should be like a thin syrup, not thick caramel. This allows it to soak beautifully into the cake.
If you want an extra glossy finish, you can whisk in a tablespoon of heavy cream at the end. This gives the glaze a velvety texture and that picture-perfect sheen.
Step 6 – Glaze, Soak, and Serve
Here’s where everything comes together.
While the cake is still warm (not hot, not cool), use a long skewer or fork to poke small holes all over the surface—right in the pan. Slowly pour the warm caramel glaze over the cake, letting it seep into every crevice.
Be patient—pour a little at a time and let it absorb before adding more. The cake will literally drink it up like a sponge. This is the secret behind that moist, flavor-packed texture.
Let it sit for 15 minutes to fully absorb the glaze, then gently invert it onto a serving plate. The caramel that soaked into the cake will have created a buttery sheen on the outside.
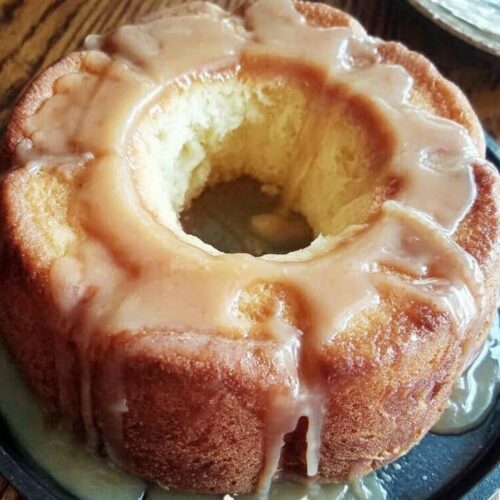
Finally, drizzle any remaining glaze over the top, letting it cascade down the sides just like in the photo. It should look glossy, golden, and irresistibly rich.
Serve it slightly warm with an extra sprinkle of sea salt or a scoop of vanilla ice cream. The contrast between the warm cake and the cool cream is divine.
And there it is—your Salted Caramel Kentucky Butter Cake, a masterpiece of simplicity and Southern flavor.
The Secret to a Perfectly Moist Butter Cake
If your goal is that tender, melt-in-your-mouth texture, here are the secrets every home baker should know:
- Room Temperature Ingredients:
Cold butter or eggs can cause the batter to curdle. Let everything sit out for at least 30 minutes before starting. This ensures a smooth, even mix. - Don’t Overmix:
Once the dry ingredients are added, mix just until combined. Overworking the batter develops gluten, which can make the cake dense instead of fluffy. - Bake at the Right Temperature:
Too hot, and the edges burn before the center cooks. Too low, and the cake won’t rise properly. That’s why 325°F is the sweet spot for this recipe. - Glaze While Warm:
The warmth of the cake helps absorb the caramel glaze perfectly. If it’s too cool, the glaze will sit on top instead of soaking in. - Resting Time:
Give the cake at least 20 minutes before removing it from the pan. This allows the structure to set and prevents breakage. - Aging Gracefully:
This cake tastes even better the next day because the glaze continues to infuse flavor. Store it covered at room temperature, and it stays moist for up to 4 days.
The result? Every bite is buttery, soft, and soaked in golden caramel goodness.
You may read also : Pineapple Cream Cheese Pound Cake
How to Make It Healthier (Without Losing Flavor!)
Yes, this cake is indulgent—but with a few tweaks, you can make it lighter without sacrificing taste:
- Butter Substitute: Use half butter and half unsweetened applesauce. This reduces fat while keeping the cake moist.
- Whole Wheat Flour: Replace 1 cup of all-purpose flour with whole wheat pastry flour for extra fiber.
- Less Sugar: Reduce sugar in the cake by ¼ cup and in the glaze by 2 tablespoons. The flavor will still be rich, but a bit less sweet.
- Low-Fat Buttermilk: You can use 1% or low-fat buttermilk instead of full-fat.
- Smaller Portions: Bake in mini bundt pans or muffin tins for portion-controlled servings.
You can also add a sprinkle of chopped nuts or oats on top for texture and nutrition. Even with these tweaks, it still tastes like a warm Southern hug—just with a bit less guilt!
Salted Caramel Kentucky Butter Cake
Equipment
- Bundt Pan
- Electric Mixer
- Saucepan
- Whisk
Ingredients
Cake Batter
- 3 cups all-purpose flour
- 2 cups granulated sugar
- 1 tsp salt
- 1 tsp baking powder
- 1/2 tsp baking soda
- 1 cup unsalted butter softened
- 1 cup buttermilk room temperature
- 4 large eggs
- 2 tsp vanilla extract
Salted Caramel Glaze
- 3/4 cup sugar
- 1/3 cup butter
- 3 tbsp water
- 2 tsp vanilla extract
- 1/2 tsp sea salt
Instructions
- Preheat oven to 325°F (165°C). Grease and flour a bundt pan thoroughly.
- In a large bowl, whisk together flour, sugar, salt, baking powder, and baking soda until combined.
- Using a mixer, beat butter until light and fluffy. Add eggs one at a time, then mix in vanilla extract.
- Gradually alternate adding dry ingredients with buttermilk, beginning and ending with dry mixture. Mix until smooth.
- Pour batter into prepared bundt pan. Bake for 60–65 minutes or until a toothpick comes out clean.
- In a small saucepan, combine sugar, butter, and water. Bring to a boil and cook until sugar dissolves, about 2 minutes. Remove from heat and stir in vanilla extract and sea salt.
- While the cake is still warm, poke holes all over and slowly pour warm caramel glaze over the cake. Let soak for 15 minutes.
- Allow the cake to cool completely, then invert onto a serving plate. Drizzle extra caramel if desired.
Notes
Serving Suggestions and Pairings
A cake this luscious deserves to be served with a little flair. Whether you’re presenting it at a family dinner or just spoiling yourself on a cozy weekend, there are countless ways to elevate your Salted Caramel Kentucky Butter Cake experience.
1. Classic Style
Serve it just as it is—warm, golden, and glossy. The caramel glaze is already doing all the heavy lifting here, adding shine and sweetness. You can dust a bit of powdered sugar on top for that elegant, bakery-style finish.
2. À la Mode (With Ice Cream!)
There’s something magical about the combination of warm cake and cold ice cream. A scoop of vanilla bean, butter pecan, or even salted caramel ice cream pairs beautifully. As the ice cream melts, it creates a creamy sauce that mingles with the caramel glaze—pure indulgence in every bite.
3. Coffee or Tea Pairing
If you’re serving this cake in the afternoon or as a dessert after dinner, pair it with:
- A rich espresso or dark roast coffee to balance the sweetness.
- A chai latte for a warm spice complement.
- A black tea with honey for a soft, classic touch.
For an adult twist, a splash of bourbon or Baileys Irish Cream in your coffee enhances the caramel tones even further.
4. Festive Touches
Hosting a celebration? Add flair by serving slices with:
- Whipped cream topped with caramel drizzle.
- Candied pecans or sea salt flakes for texture.
- Fresh fruit—like sliced pears, apples, or berries—to add a refreshing contrast.
This cake also makes a beautiful holiday centerpiece. Place it on a rustic cake stand, drizzle extra caramel, and sprinkle a few edible gold flakes for a festive sparkle.
5. Leftover Magic
If you have leftovers (and that’s a big if), here are a few fun ways to repurpose them:
- Caramel Trifle: Layer chunks of cake with whipped cream and caramel sauce in a glass.
- French Toast Style: Slice the cake, dip in egg and milk mixture, and toast it on a skillet—yes, butter cake French toast!
- Cake Parfait: Alternate layers of crumbled cake, yogurt, and fruit for a quick dessert or breakfast treat.
This cake doesn’t just stop at dessert—it reinvents itself every time you serve it.
Check this recipe : Halloween Punch
Common Mistakes and How to Avoid Them
Even simple recipes can trip up bakers if they’re not careful. Let’s troubleshoot a few common pitfalls so your Salted Caramel Kentucky Butter Cake turns out perfect every single time.
1. The Cake Sticks to the Pan
This is a classic bundt cake struggle. The best defense? Proper preparation. Always grease and flour the pan thoroughly, and make sure to reach every ridge. Let the cake cool at least 15–20 minutes before flipping it out. If it’s too hot, it’ll break; too cool, and it’ll stick.
Pro tip: After removing from the oven, gently run a butter knife along the edges before inverting to loosen it.
2. The Cake Is Dry
Dryness usually means overbaking or using too much flour. Stick to the baking time range (60–65 minutes) and check early if your oven runs hot.
Also, always spoon and level your flour—never scoop directly from the bag. And don’t forget the soaking glaze! It’s the key to that soft, moist texture.
3. The Glaze Crystallizes or Turns Grainy
This happens when sugar isn’t fully dissolved or the glaze is overcooked. Keep your heat moderate, stir gently, and don’t rush the process. Once the sugar dissolves, remove it from heat and add vanilla and salt immediately to stop the cooking process.
4. The Cake Tastes Too Salty or Too Sweet
Balance is everything. Use sea salt, not table salt—it’s milder and adds subtle bursts of flavor. If you’re worried about sweetness, reduce the glaze sugar slightly or drizzle less on top.
5. The Cake Didn’t Rise Properly
Make sure your baking powder and baking soda are fresh—expired leavening agents won’t give the lift you need. Room-temperature eggs and butter also help achieve better aeration when creamed.
Avoiding these small mistakes ensures your cake looks as good as it tastes—beautifully golden, soft, and draped in caramel perfection.
Storage and Make-Ahead Tips
The beauty of this cake is that it actually gets better with time. Here’s how to store it for peak flavor and freshness:
1. Room Temperature Storage
If you plan to eat it within a few days, store the cake at room temperature. Cover it with a cake dome or wrap it tightly in plastic wrap. It stays moist for up to 4 days, thanks to the caramel glaze that acts as a natural preservative.
2. Refrigeration
Need to keep it longer? Refrigerate it in an airtight container for up to 7 days. When you’re ready to serve, let it come to room temperature or microwave individual slices for 10–15 seconds. The butter will soften, and the glaze will turn deliciously glossy again.
3. Freezing
Yes, this cake freezes beautifully! Slice it first, wrap each piece in parchment paper, and then seal in freezer bags. When cravings hit, thaw a slice at room temperature for an hour or warm it gently in the microwave.
4. Make-Ahead for Events
Hosting a dinner or holiday party? Bake the cake a day ahead, pour on the glaze, and let it rest overnight. The caramel will have time to soak deeply, resulting in an even richer flavor the next day. In fact, most bakers swear it tastes best after 24 hours.
5. Reviving Leftovers
If your cake starts to dry out (though it rarely does), drizzle a bit of warm caramel sauce or even a spoonful of honey before reheating. It’ll spring back to life with that just-baked aroma.
Variations and Flavor Twists
Once you master the base recipe, there’s plenty of room to experiment. Here are a few irresistible twists that will make you fall in love with this cake all over again.
1. Chocolate Caramel Version
Add ½ cup of cocoa powder to the dry ingredients for a deep, chocolatey twist. The combination of dark chocolate and salted caramel is decadence on a plate. You can even drizzle melted chocolate over the finished cake for an extra wow factor.
2. Maple Bourbon Glaze
For a grown-up flavor, replace 1 tablespoon of water in the glaze with bourbon and add a splash of maple syrup. It adds warmth and a subtle smokiness that pairs perfectly with the buttery base.
3. Nutty Delight
Fold ½ cup of chopped pecans or walnuts into the batter or sprinkle them on top before glazing. The nuts add crunch and a rustic, Southern charm.
4. Lemon or Orange Butter Cake
Add citrus zest to the batter for a bright, refreshing note. Pair it with a lighter caramel or honey glaze for a spring or summer version.
5. Espresso Infusion
If you love coffee desserts, dissolve 1 tablespoon of instant espresso powder in the buttermilk before mixing. The coffee enhances the caramel flavor and adds depth without overpowering the sweetness.
Each of these variations gives the same comfort as the original but with its own personality. Whether you’re craving cozy, classy, or creative, there’s a version for every mood.
People read also : Caramel Pound Cake Recipe – A Rich, Buttery Delight with Decadent Caramel Glaze
The Southern Touch – Why Butter Cakes Feel Like Home
There’s something about a butter cake that feels timeless. It’s not just about ingredients—it’s about tradition.
In the South, recipes like this one aren’t merely instructions; they’re family heirlooms. Passed from grandmother to mother to daughter, often scribbled on a weathered recipe card with a few butter stains as proof of their worth.
The Kentucky Butter Cake captures everything Southern desserts stand for—comfort, generosity, and the joy of gathering. It’s a cake that invites people to sit, talk, and share stories. You’ll often find it at Sunday suppers, church socials, or holiday tables, surrounded by laughter and the clinking of plates.
Adding salted caramel gives it a modern flair while keeping the heart of the tradition alive. It’s that beautiful balance between old-fashioned love and modern indulgence.
Every bite tells a story—a little bit of nostalgia, a little bit of luxury, and a whole lot of butter.
Conclusion – A Cake That Feels Like a Hug
The Salted Caramel Kentucky Butter Cake isn’t just a dessert; it’s an experience. From the moment you mix the first bowl of buttery batter to the final drizzle of warm caramel, it fills your kitchen with love and your home with comfort.
It’s the kind of cake that brings people together—simple, soulful, and spectacularly delicious. The salted caramel glaze takes it from ordinary to unforgettable, making each slice taste like something straight out of a Southern bakery.
Bake it once, and it’ll become your go-to for birthdays, holidays, or “just because.” Because honestly, every day is a good day for butter and caramel.
So go ahead, grab your bundt pan, preheat that oven, and make a little Southern magic in your kitchen. You deserve it.
FAQs
1. Can I use salted butter instead of unsalted?
Yes, you can! Just reduce the added sea salt in the glaze to balance the flavor. Salted butter can actually enhance the caramel notes beautifully.
2. How do I fix a caramel glaze that turns grainy?
Graininess happens when sugar crystals reform. To fix it, add a tablespoon of water and gently reheat, stirring until smooth again. Always dissolve sugar completely before boiling.
3. Can I bake this cake without a bundt pan?
Absolutely. You can use a regular tube pan or even two loaf pans. Just keep an eye on baking time—it may cook slightly faster in shallower pans.
4. What’s the difference between butter cake and pound cake?
Pound cake is denser and traditionally uses equal parts butter, sugar, flour, and eggs. Butter cake, on the other hand, is lighter, fluffier, and moister—especially with that caramel soak.
5. How can I make this recipe gluten-free?
Use a 1:1 gluten-free flour blend designed for baking, and ensure your baking powder is gluten-free. The texture will be slightly different but still rich and delicious.